
Permafrost Cold Zones require clothing whose Cold Resistance is sufficient for the conditions you are entering, plus a reserve of Body Warmth for the return journey. There is no confirmed single outfit or universal temperature threshold that makes every Cold Zone safe. Compare your equipped protection with the current environment and watch whether Body Warmth remains stable after entry.
Build the outfit one slot at a time. A later clothing set can improve some pieces while replacing a warmer hat with a weaker one. Armor and Cold Resistance solve different problems, so use the cold attribute when preparing for exposure and check Armor separately when enemies are part of the route.
Data version: Numerical recipe or quest entries from MetaBot use its 0.44.2.4634-milestone export. This is a source reference, not confirmation that every entry remains available after later patches.
Check the equipped pieces before leaving shelter
Open the equipment screen and compare the clothing you are actually wearing. A crafted garment in your inventory does not protect you as an equipped replacement. Check the head, torso, hands, legs, and feet rather than treating the outfit name as a complete guarantee.
For each possible replacement, ask:
- Does its Cold Resistance improve the slot you are replacing.
- Does the equipment screen show the change after you equip it.
- Does it cost materials you still need for a required garment or repair.
- Does its Armor change matter for the enemies on this route.
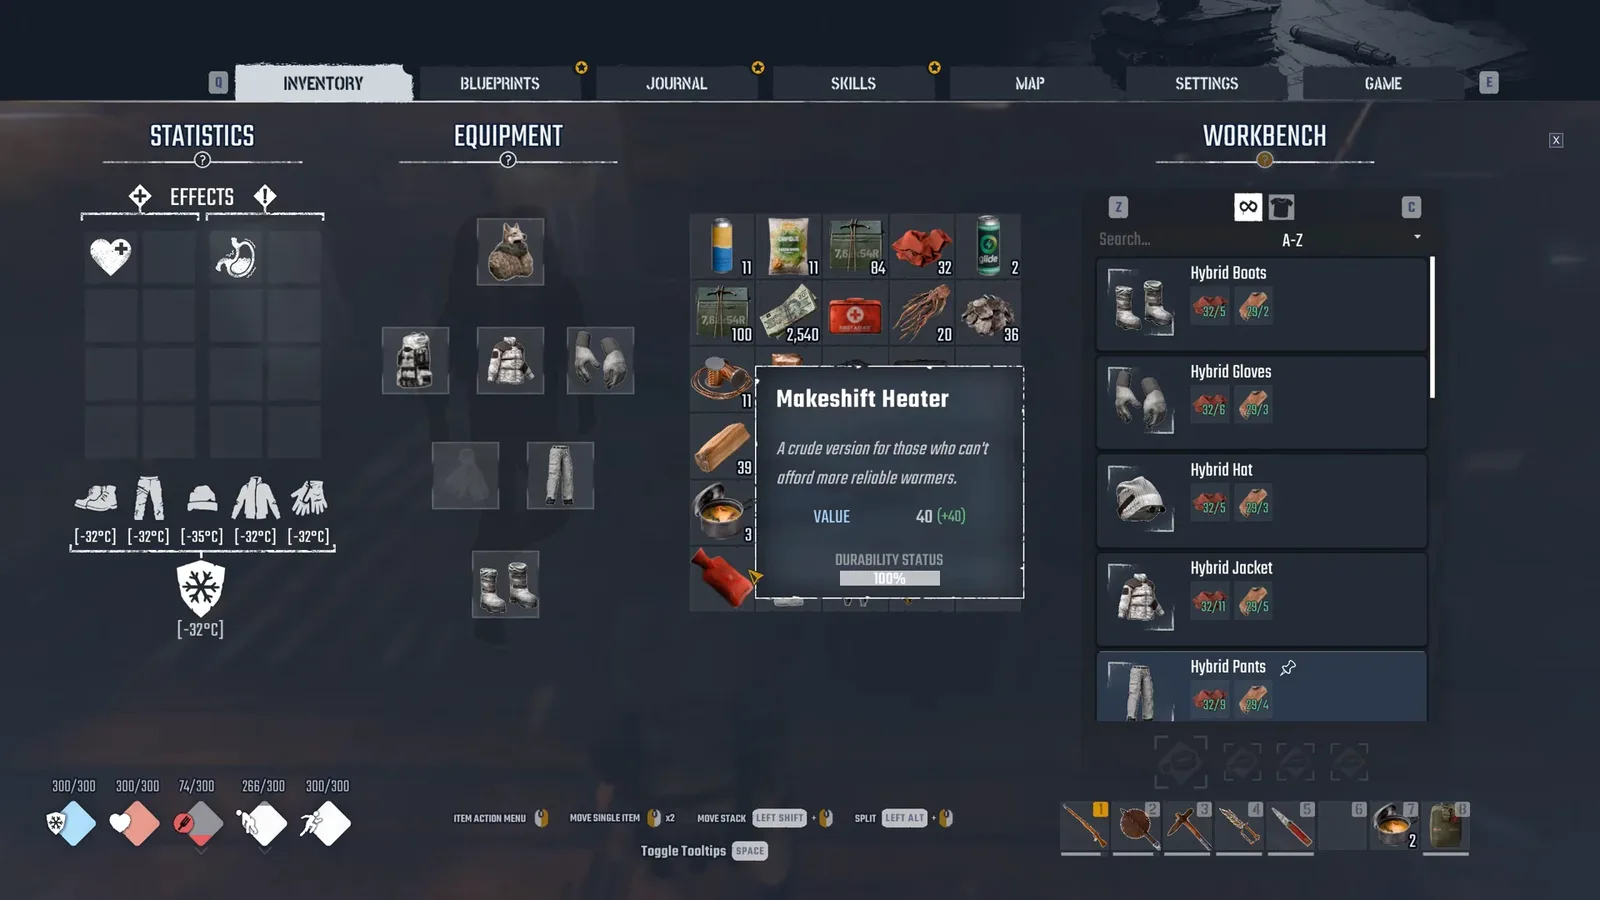
Compare equipped clothing and portable protection in your own game.
Keep a stronger existing item when a new piece does not improve the attribute you need. Crafting an entire set for a quest and equipping every piece for a cold trip are separate decisions. Complete the active crafting requirement, then wear the combination that offers the protection you need.
Use your current protection as the entry check
Temperature can change when you cross a Cold Zone boundary. An outfit that keeps you comfortable around a base or on an ordinary road can start losing warmth in the exposed area beside it.
Before crossing, read your equipment's protection and the environmental temperature. After crossing, inspect the warmth meter. Stable or recovering Body Warmth gives you a practical indication that the outfit is handling those conditions. Falling warmth means the current combination is still consuming your reserve, even if the loss is slower than before.
Do not wait until Health falls to assess the clothes. Body Warmth can drain while Health still looks fine, and continued exposure after the warmth reserve reaches zero starts damaging Health. Entering with full Health therefore does not replace the clothing check.
Weather and time of day can also make the return colder than the outward trip. Recheck the conditions before committing to extra exploration, especially if your equipment only barely handled the first crossing.
Build the clothing chain before the long trip
Clothing recipes are made at the Tailoring Bench. The recipe, workstation, and materials all need to be available before a better outfit can help you.
Treated Hide is produced at the Tanning Rack from pelts and Animal Fat. Cloth is another common garment input. When you are preparing several pieces, total both materials before crafting or converting hide into Cloth. A surplus of one does not make up for a shortage of the other.
Carry the ingredients in your own inventory when using the Tailoring Bench. Leaving them in a nearby chest can make a learned recipe appear short of materials even though you gathered enough. Check where the supplies are stored before starting another hunting or scavenging trip.
The active quest should guide mandatory crafting. The Way Home asks for Tribal clothing, while later progression introduces Hybrid equipment. Those objectives do not establish that every new garment will outperform every piece you already own.
Prepare the Hybrid set without replacing a better slot
Hybrid recipes are granted together through Anna's reward during Breaking the Radio Silence. Claim the reward when the quest reaches the blueprint-collection step, then check the five pieces at the Tailoring Bench.
The material costs are:
| Hybrid piece | Cloth | Treated Hide |
|---|---|---|
| Boots | 5 | 2 |
| Gloves | 6 | 3 |
| Hat | 5 | 3 |
| Jacket | 11 | 5 |
| Pants | 9 | 4 |
| Full set | 36 | 17 |
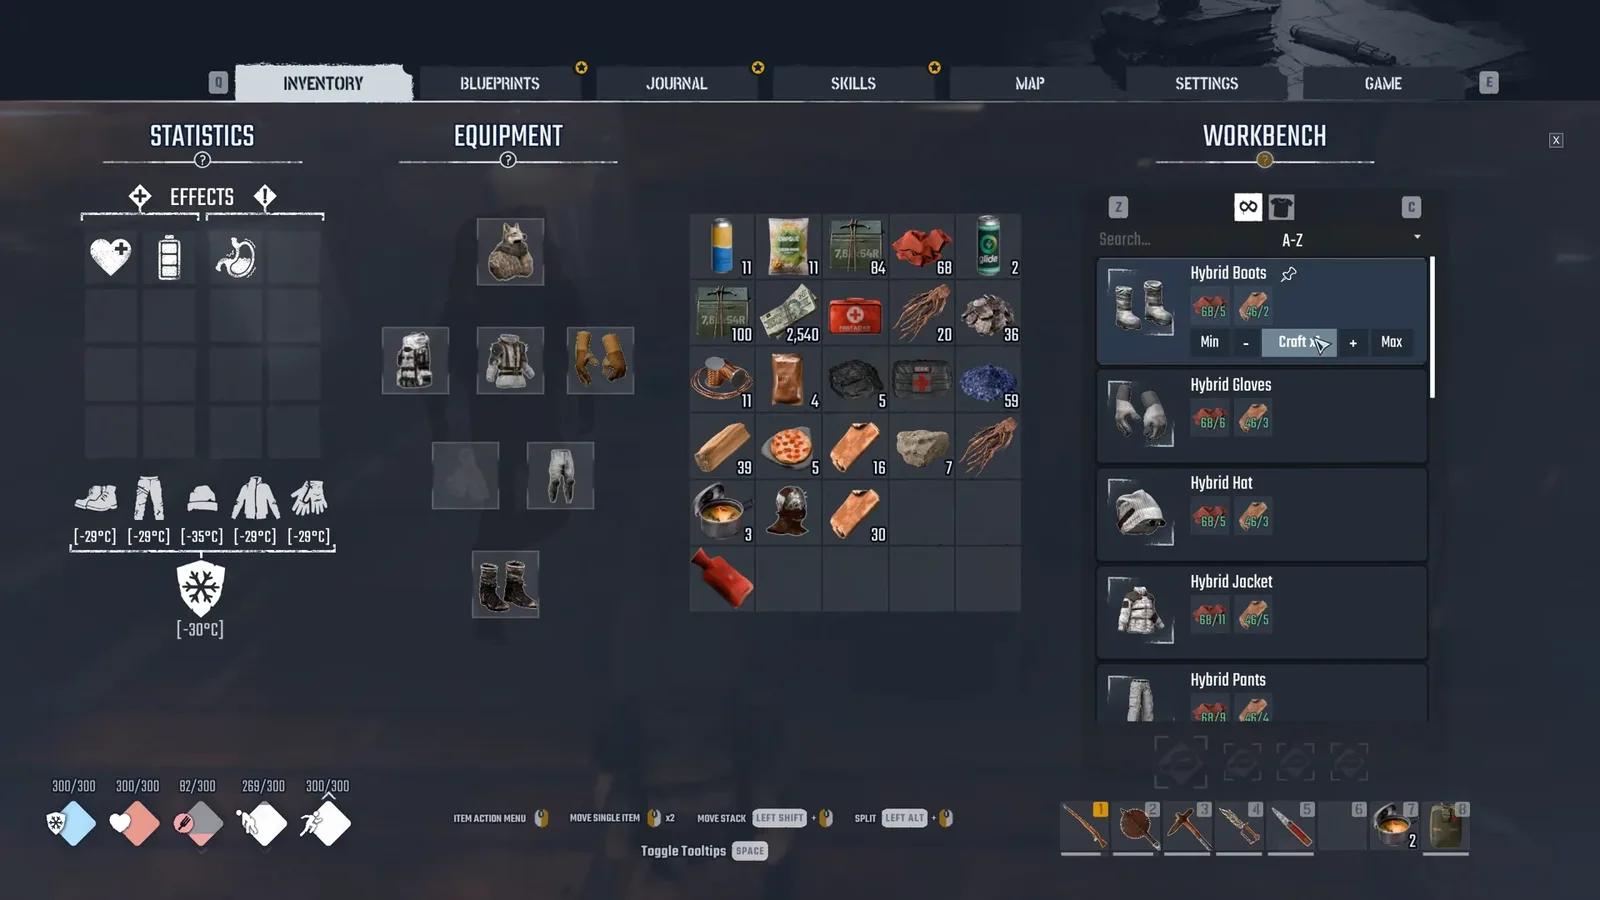
The garment recipe shows Cloth and Treated Hide requirements before crafting.
Use the table to prepare the crafting job, then compare the finished garments with your currently equipped pieces. Do not turn the full-set cost into a rule that you must replace all five slots for every journey.
The Wolf Head Hat is a useful example. It can be a warmer option than the Hybrid Hat in the equipment comparison. Check your actual slot values before replacing it. If the quest asks you to craft the Hybrid Hat, make it for the objective while keeping the warmer hat equipped for the trip when appropriate.
A Wolf Head Hat can come from Skinwalker's wolf hunting challenge at Hunter's Glade, and Hunter can begin with one. The hunting challenge is separate from the main lookout repair task. Do not restart your character solely because the head-slot item is absent from your starting equipment.
Find Lunar clothing under the Permafrost name
When your progression provides Lunar blueprints, study them before giving them to Jeremy. At the Tailoring Bench, the related clothing appears under the Permafrost name.
That naming difference can make a learned outfit look absent. Check Permafrost entries at the station instead of repeatedly searching only for “Lunar.” The later recipes involve advanced ingredients, including Quality Metal and Moonrock Ingot, so learning the blueprint and being ready to make the pieces are separate milestones.
No guarantee is established here that every later outfit is already accessible to your current character, or that its name alone makes it sufficient for a particular Cold Zone. Confirm the recipe and equipped result before using it as the basis for a long crossing.
Add portable protection to the clothing plan
A Makeshift Heater helps on routes where you cannot depend on a Campfire. It has limited durability, so check its condition before leaving. A damaged or exhausted heater cannot provide the protection you expected when planning the outfit.
Repair the heater at a Repair Bench when needed and inspect the currently displayed materials. Consider a spare for a long exposed trip when the remaining condition may not cover the return. The heater can slow warmth loss without making the zone completely safe, so continue watching the meter after equipping it.
Warming drinks and food provide another temporary layer of protection. Carry a suitable drink or dish and use it when the extra cold protection matters. Check the item effects rather than assuming every beverage helps; Moonshine can have a negative cold-resistance effect.
These supplies complement the outfit. Their temporary benefits and the heater's durability should be included in your route budget instead of treated as permanent clothing upgrades.
Match the equipment plan to the destination
Bunker Checkpoint
The exposed upper checkpoint can show Bone-Chilling Cold. It also contains elevated stairs and platforms, so exposure can combine with fall damage. If your goal is simply to continue toward Hunter's Glade, stay focused on that route rather than making unnecessary detours through the exposed upper area.
Some nearby ground restricts construction. Check that you have a warming option before entering; carrying Campfire materials does not guarantee you can place one where the cold becomes dangerous.
Tower of Finn
The journey toward Finn's tower needs a return plan as well as an arrival plan. Leave House Camp with the warmer equipped combination, a functioning heater, and suitable supplies. Reaching the upper tower does not automatically restore Body Warmth.
Budget protection for the descent and the walk away from the exposed area. After the required conversation or interaction, follow the next objective instead of remaining in the cold just because you successfully reached the landmark.
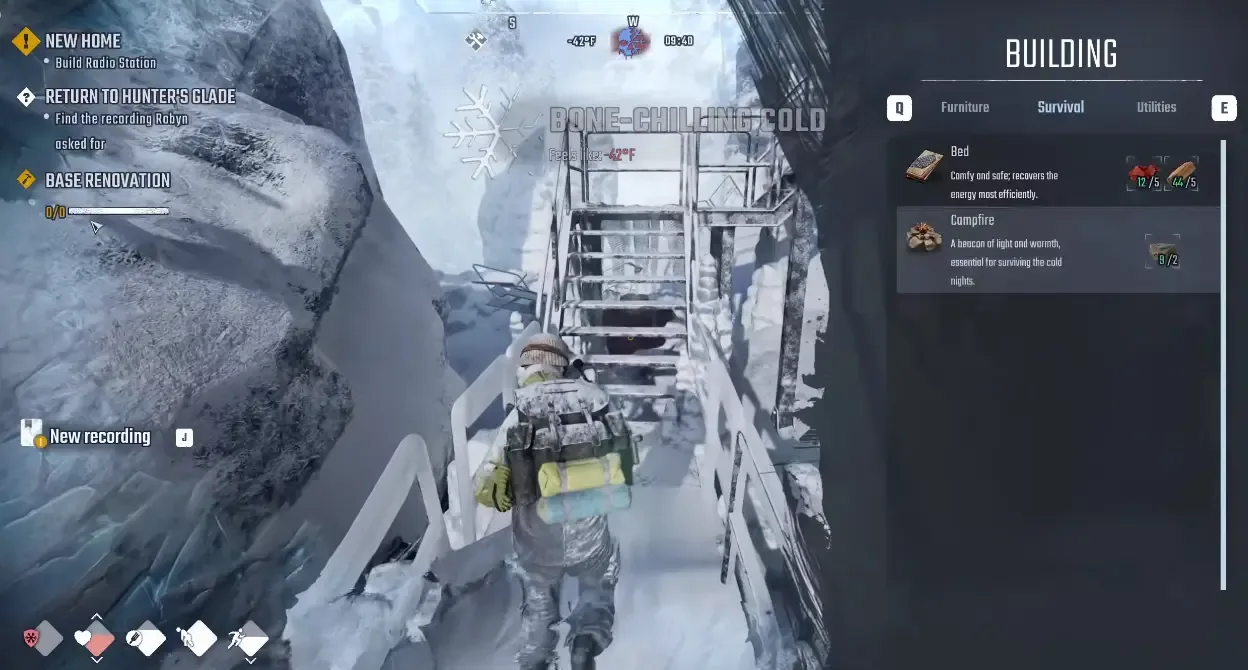
This is a Cold Zone interface example; the displayed temperature is not a universal clothing requirement.
Decide whether to continue after the first exposure
If Body Warmth starts falling, use its rate and your remaining reserve to decide whether the planned interaction is still reasonable. Keep enough for the return and an unexpected delay. A meter that is already near zero is a reason to leave exposure, not a reason to test the outfit for longer.
Recover at a reliable heat source, repair the heater if necessary, and improve the weakest useful clothing slot before trying again. Change one part of the equipment plan at a time when you are comparing results so you can identify what actually improved the crossing.
The requirement is the protection that works for the current location and conditions. Confirm it from the equipped stats and the warmth meter, then keep the return route within that protection's limits.
Sources and version notes
Sources checked: 12 October 2026. Verification labels refer to the cited documentation and its stated limits; this site has not independently tested these steps in the game. Compare the information with your installed build.
- How to Stay Warm in Permafrost: Heaters & Cold Zones — Third-party gameplay guide. Scope: Warm Hands at active/fuelled fire; portable heater durability; clothing vs Armor; own inventory.
- Permafrost Temperature: Biomes, Heat & Cold Zones — Extracted game data. Scope: Cold zones / shelter / heat / Body Warmth distinction; Cold Resistance and meters.
- Permafrost: How to Craft the Hybrid Clothes Set (and Treated Hide) — Guide with attributed gameplay. Scope: Hybrid recipe reward from Anna; five clothing pieces at Tailoring Bench.
- Permafrost Story Walkthrough: Main Quests in Order — Data and editorial guide. Scope: A New Beginning tools/fire/cabin/Rope; Feel The Heat Robyn Horizon; Dog Days bandage/raw meat in Bone Cave.
MetaBot recipe and quest data is attributed to 0.44.2.4634-milestone (Steam build 25834606). It describes that dataset; availability and requirements after later patches still need to be checked in your game.